Horse Wound Care: When to Treat It Yourself and When to Call the Vet
Your horse has a wound. Your heart sinks, your brain goes blank, and suddenly you can’t remember a single thing you’ve ever read about first aid. I’ve been there — more times than I care to count over 45 years with horses.
The good news is that with a clear, calm process, you can handle most wounds correctly and give your horse the best chance of a clean, complication-free recovery. This guide walks you through exactly what to do, step by step — from the moment you find the injury to knowing when you absolutely need to call your vet.
🩺 Free Horse First Aid Kit Checklist
Before you need it is the time to prepare. Download my free printable checklist so your kit is stocked and ready for exactly this moment.
Get the Free Checklist →Before You Touch the Wound: Assess First
Your instinct will be to rush in and do something. Resist it. Taking sixty seconds to properly assess the situation before you act can prevent you from making things worse — or missing something serious.
Stand back and ask yourself:
- Is my horse calm enough for me to approach safely?
- Is there active bleeding — and how heavy is it?
- Where exactly is the wound located?
- Is any structure other than skin involved (tendon, joint, bone)?
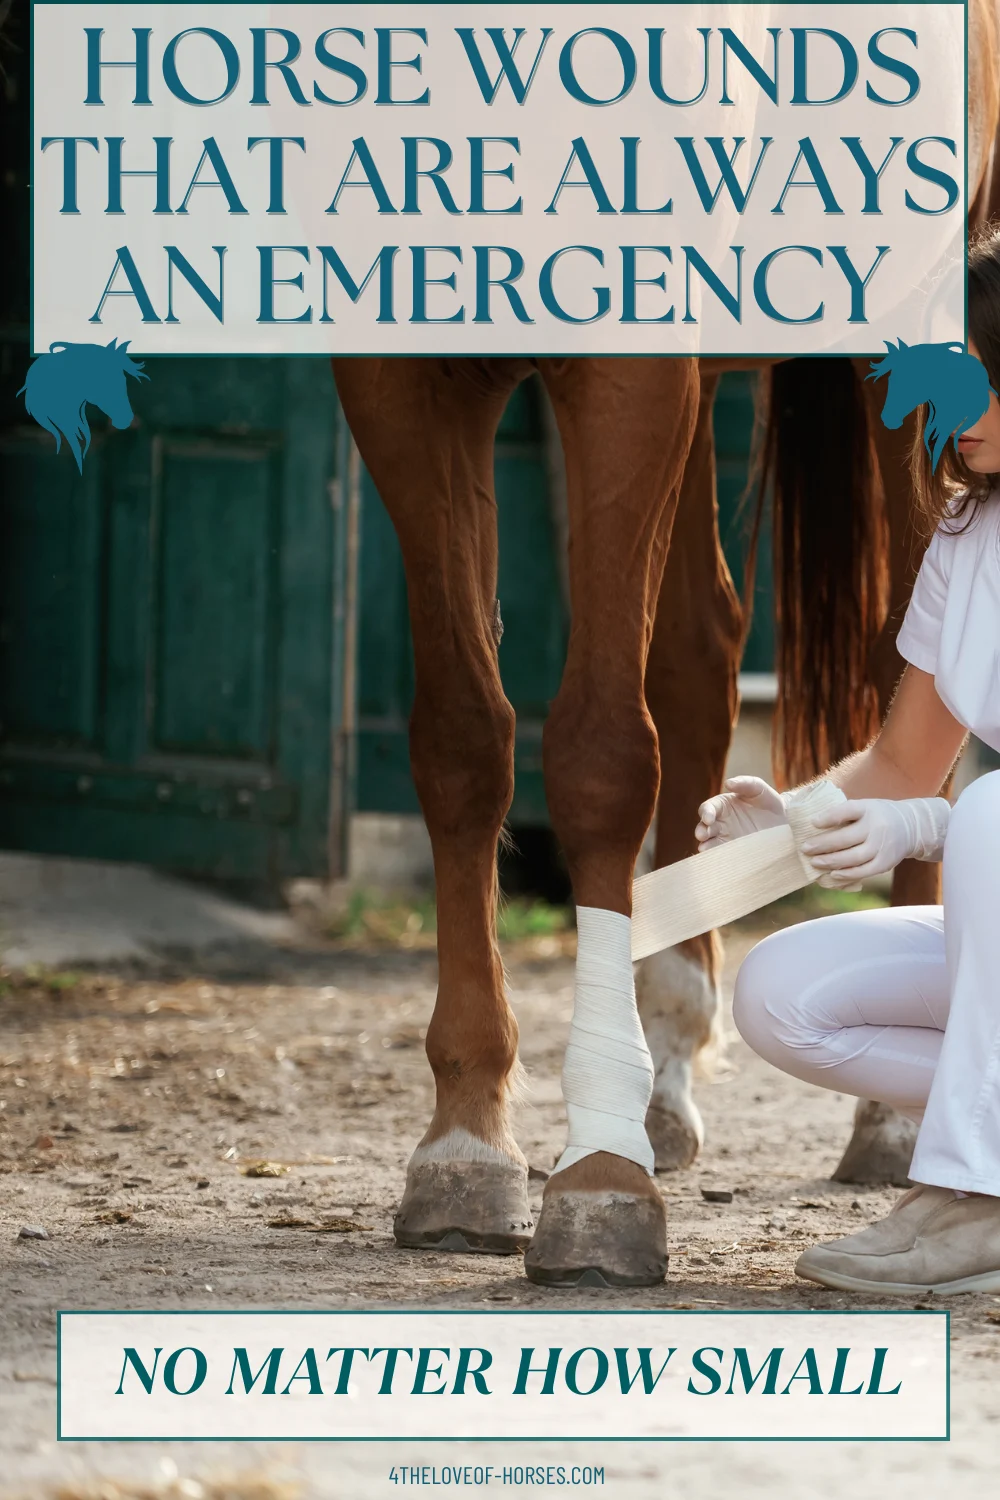
Bleeding that won’t slow with firm pressure after 5–10 minutes • A wound near or over a joint • Any wound that exposes tendon, bone, or deep tissue • A puncture wound — especially in the foot or chest • Wounds in the eye area • Any injury where your horse is severely lame or non-weight bearing.
Step-by-Step: How to Treat a Horse Wound
Restrain Your Horse Calmly
Have someone hold your horse, or tie them safely. A horse in pain or shock can move unpredictably, and you need both hands free. Speak quietly and move slowly — your energy directly affects theirs.
If you’re alone, use a quick-release knot and tie to something solid. Never wrap a lead rope around your hand.
Control Bleeding
For actively bleeding wounds, apply direct pressure immediately using a clean pad of gauze or a folded clean cloth. Press firmly and hold — don’t keep lifting the pad to check, as this disturbs clot formation.
Maintain pressure for a minimum of 5 minutes before checking. If blood soaks through, add more material on top rather than removing the original pad.
Tip: Avoid using cotton wool directly against an open wound — the fibres stick and are difficult to remove without reopening the wound. Gauze is your friend.
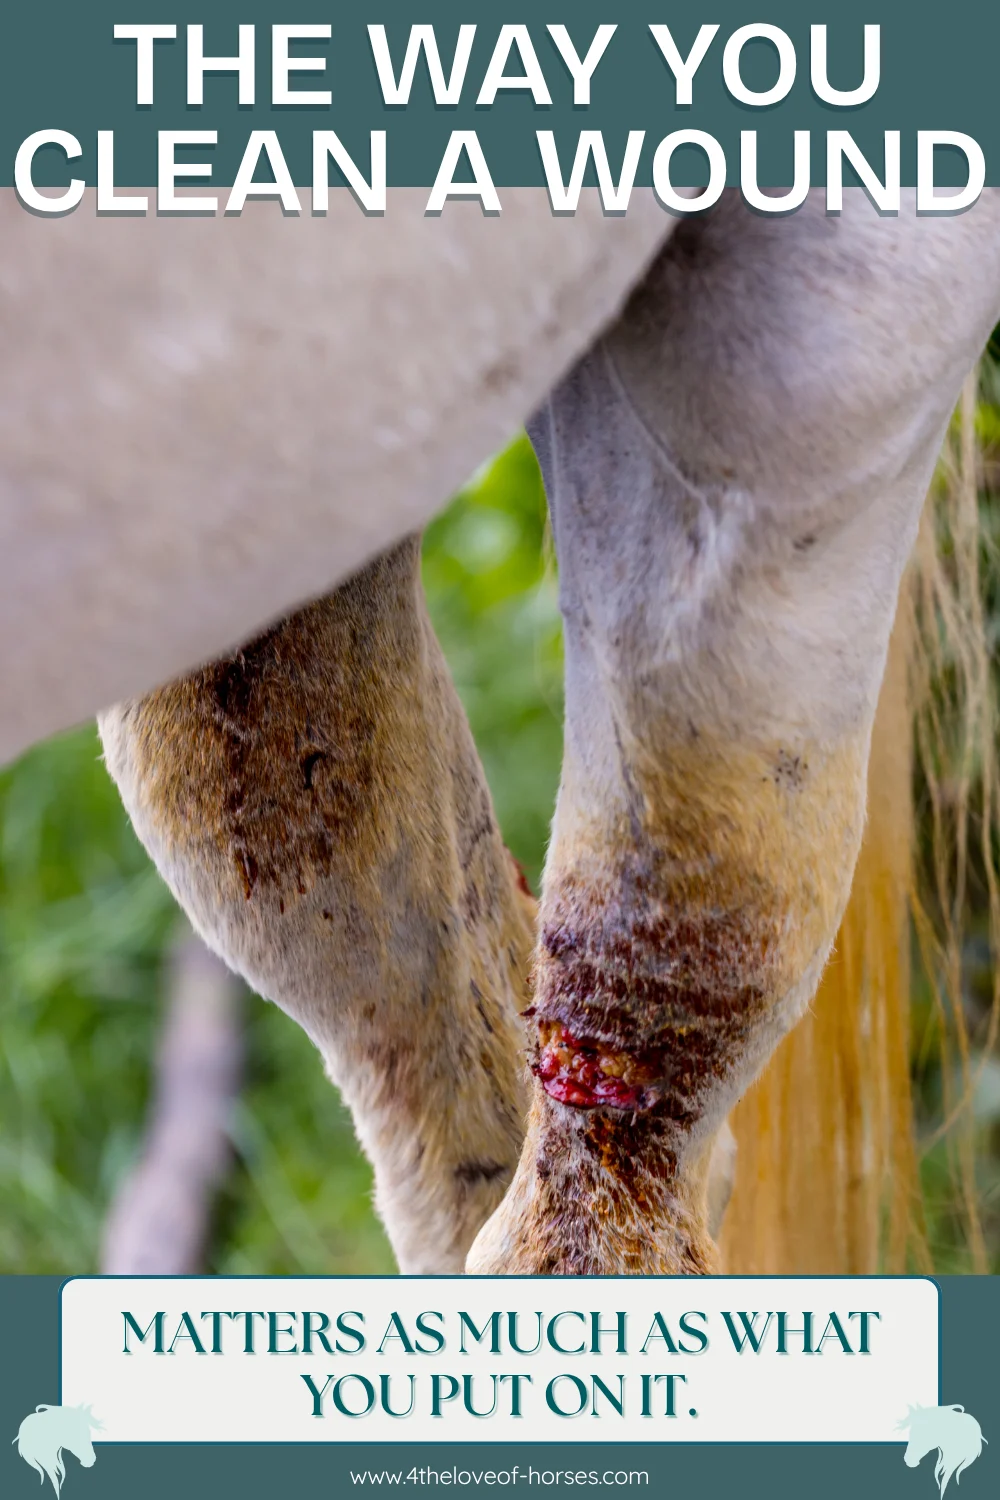
Clean the Wound
Once bleeding is controlled, gently clean the wound with clean, lukewarm water. A syringe (20–35ml) filled with saline or clean water works brilliantly for flushing debris out of a wound without spreading contamination.
Flush from the inside outward — never drag debris across the wound surface. For wounds with significant dirt or grit, this step is critical. Infection from trapped contamination is far more damaging than the wound itself.
Saline solution: Mix 1 teaspoon of table salt into 500ml of clean, boiled (then cooled) water. This is gentle on tissue and effective for flushing.
Assess the Wound Properly
With the wound clean, take a proper look. You need to determine:
- Depth: Is it superficial (skin only) or does it go deeper?
- Location: Is it near or over a joint, tendon sheath, or bone?
- Edges: Are the wound edges clean and close together, or gaping and irregular?
- Contamination: Is there debris you cannot fully flush out?
Wounds over joints — even small ones — are emergencies. Joint fluid is straw-coloured, thin, and slightly sticky. If you see it, do not attempt home treatment. Call your vet immediately.
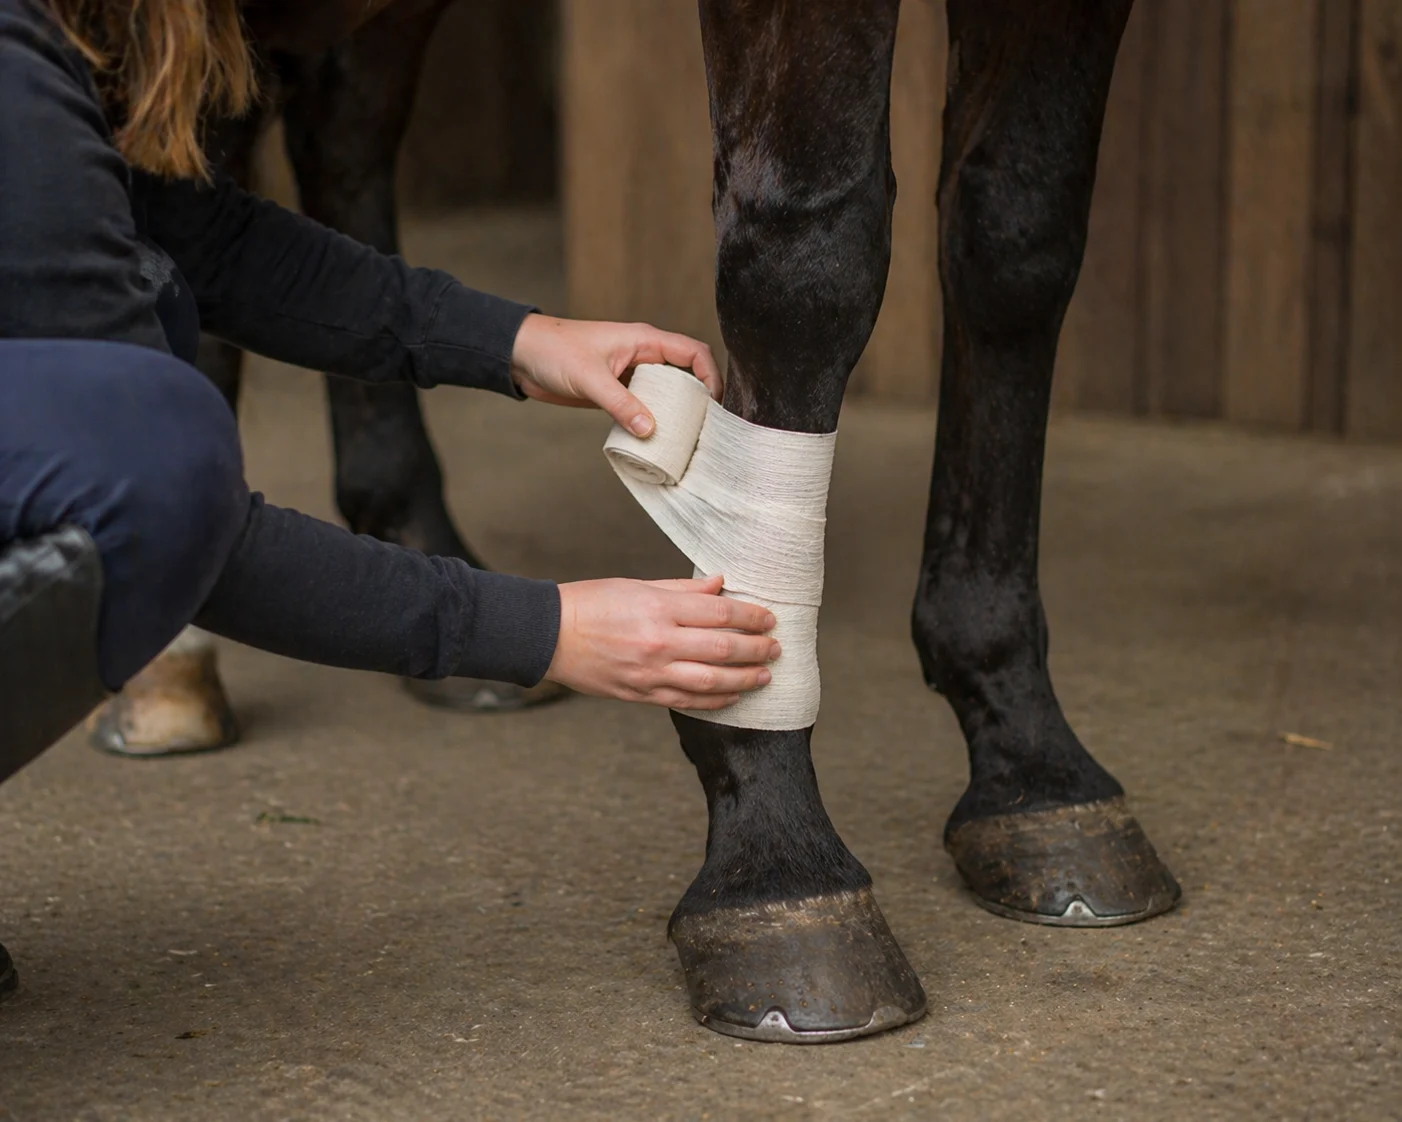
Apply Wound Dressing
For wounds that don’t require stitches, apply a thin layer of a veterinary wound ointment or gel. Less is more — thick layers of cream trap moisture and can slow healing. The aim is to keep the wound surface moist but not wet.
Cover with a non-stick wound pad, then apply a conforming bandage, and finish with cohesive bandage or stable bandage if the wound is on a limb. The bandage should be snug but not tight — you should be able to slip two fingers under the top edge.
A bandage applied too tightly can cause a bandage bow — pressure damage to the flexor tendons that can be worse than the original wound. When in doubt, less tension is safer than more.
Decide: Vet or Monitor?
Not every wound needs a vet call, but when in doubt — call. Vets would far rather advise you over the phone and not be needed than miss a wound that required stitches within the first six hours.
Stitches become less viable after 6–8 hours as bacteria multiply in the wound tissue. If there’s any chance a wound needs suturing, make that call early.
Monitor and Manage During Healing
A wound you treated yesterday still needs daily attention. Check it morning and evening for the first week. You’re looking for:
- Increased heat, swelling, or redness around the wound — signs of infection developing
- Discharge: a small amount of clear or slightly amber fluid is normal; thick yellow or green pus is not
- Proud flesh (excessive granulation tissue) — most common on lower limb wounds; if it starts to develop, call your vet before it gets established
- Your horse’s demeanour — increasing lameness, dullness, or loss of appetite are flags
Tetanus: Always confirm your horse’s tetanus vaccination status after a wound. Puncture wounds especially carry high tetanus risk. If your horse is not up to date, call your vet for a booster and/or antitoxin.
Quick Reference: Wound Type Guide
| Wound Type | Description | Action |
|---|---|---|
| Superficial graze | Skin surface only, minimal bleeding | Clean, apply ointment, monitor |
| Laceration (small) | Clean cut, edges close together, <2cm | Clean, dress, monitor closely |
| Laceration (large/gaping) | Edges apart, may need suturing | Call vet within 2–4 hours |
| Puncture wound | Small entry, potentially deep | Always call vet — deceptively serious |
| Wound near joint | Any location over joint capsule | Emergency — call vet immediately |
| Wound with tendon visible | Pale, cord-like structure visible | Emergency — call vet immediately |
| Eye area wound | Eyelid, orbit, or eyeball involved | Emergency — call vet immediately |
What to Keep in Your First Aid Kit
The worst time to discover your wound kit is incomplete is when you’re standing next to an injured horse. These are the basics every horse owner should have on hand at all times:
- Sterile gauze pads (non-stick)
- Conforming bandage (multiple rolls)
- Cohesive/self-adhesive bandage
- Stable bandages and Gamgee padding
- Saline solution or sachets
- 60ml curved-tip syringe for flushing
- Veterinary wound ointment or gel
- Blunt-ended scissors
- Disposable gloves
- Your vet’s phone number — written down, not just saved in a phone that may have no signal
📋 Download the Full First Aid Kit Checklist
Printable, A4-ready, and formatted so you can stick it inside your kit. Free for subscribers.
Download Your Free Guide →A Word on Wound Healing in Horses
Horses heal differently to other animals, and lower limb wounds are notoriously problematic. The skin below the knee and hock has poor blood supply relative to the body, which means healing is slower and infection risk is higher. Proud flesh — excessive granulation tissue — is a constant threat on lower limb wounds and can permanently affect soundness if not managed early.
The single most important factor in how well a wound heals is how well it is managed in the first 24–48 hours. Clean it properly, protect it appropriately, and monitor it consistently. That’s the formula.
After 45 years with horses, the wounds that went wrong on my farm were almost always the ones I underestimated. A small puncture that “looked fine.” A joint area wound I assumed was superficial. Horses are experts at hiding how much something hurts. When in doubt, pick up the phone.
Further Reading
Check Your Horses Vital Signs – essential knowledge to have.
What you need in your Horse First Aid Kit
When to call your vet immediately